Japanese Natural Stones also referred to as Tennen Toishi, Awasedo, or JNATs are a type of sedimentary whetstone which range from very soft to very hard and very coarse to very fine. These stones have a variety of uses from honing razors, sharpening knives and other tools, as well as polishing blades. There are a range of designators to help determine the qualities and composition of each stone. Read below for more information.
Please keep in mind as going through this page, I am one person. I can be wrong about information though I try my best. This is not meant to be the definitive resource for stones, and it is not infalible. It is always wise to read multiple sources and draw conclusions from the combined information and your own experiences. Many fantastic sources which have helped me can also be found here.
Sections
History
Types of Japanese Natural Stones (JNATs)
Does Japanese Natural Stones (JNATs) Slurry Break Down?
Japanese Natural Stones (JNATs) Grit Rating
Aratoishi – Coarse Stones
— Known Aratoishi List
Nakatoishi / Chu-Shiage Toishi – Medium Stones
— Known Nakatoishi List
Bench Nagura & Why are they called Nagura?
— Known Bench Nagura List
Awasedo / Shiage Toishi – Finishing Stones
— Known Awasedo / Shiage Toishi List
— Awasedo Naming / Labeling and Mine Origin
— Awasedo Polishing – Setting Appropriate Expectations
— Awasedo Hardness / Fineness Scale – Sharpening / Honing / Polishing
— Awasedo Hardness / Density Scale
Uchigumori
— Known Uchigumori List
Inclusions and Toxic Inclusions
Naguras
Different Japanese Mines
Further Information
History
Naturally created stone suitable for blade sharpening formed over the last 150-250 million years as sediments such as volcanic ash and the remains of marine plankton which accumulated on the deep seabed or the valleys of ancient earth. Geological changes due to tectonic plate shifts resulted in varied pressures being applied to this sediment build up, which in turn creating the stone we use today. There are likely deposits of stone on each continent across the world that would make suitable whetstones, though many of the known areas have been mined to exhaustion or ceased production in the developed world. Some common examples of historic whetstones are the German Escher and Thuringian stones, the Belgian Coticule, the Arkansas Soft Stone, Cretan or Turkish Stone, and of course Japanese Natural Stone (JNATs). There are areas all over the world that produce whetstones, but those listed above have gained a reputation for certain qualities and consistencies that make them especially sought after and worthy of note.
Japan is home to some of the most abundant accessible formations of natural stone suitable for whetstones. A large majority of these veins are located just north of Kyoto or the surrounding area along a geological seam called the Hon-Kuchi Naori. This proliferation of stone is one of the prime reasons Kyoto was chosen as the seat of power in ancient Japan. Japanese Natural Whetstones are suitable for many applications but are particularly revered for their ability to leave very refined edge finishes and polish contrast. Beginning to understand the various mines, stone types, and names associated with Japanese Natural Stones (JNATS) can be very difficult. I will do my best to outline the topics in a comprehensive fashion. If you have any questions, you can always contact me about the topic.
Types of Japanese Natural Stones (JNATs)
A primer video on some of the information on this page can be found here. I generally suggest though to read through this page still as it will be a far more complete souce of information.
Japanese natural stones, also referred to as Tennen Toishi or the shortened English phrase JNATs, are a type of sedimentary shale, igneous rock, or tuff rock which range from very soft to very hard and very coarse to very fine. Often the harder the stone the finer it is, but this is not a definitive rule. Different combinations of these properties come with different benefits and use cases allowing for a large amount of experimentation. One will usually move from very coarse and softer stones through a progression of medium range stones and finish on hard and fine stones. It is also possible with the right stone which has acceptable softness and acceptable fineness to use a single stone rather than a progression. This requires a good understanding of slurry management and breaking down the slurry into a finer paste to achieve.
Natural stones can be used either in a stone progression or a nagura progression. This progression and the coarseness/fineness of the ranges can be drastically altered if you are working on tools, knives, or razors. I will cover the stone progress names and steps below from the most encompassing perspective. Note also that sword polishing/sharpening has more than 3 steps and is not compatible with this overview, though it has significant overlap. The overview of the three JNATs steps are as followed:
Aratoishi (First/Coase Grit Step) -> Nakatoishi (Middle/Medium Grit Step) -> Awasedo/Shiage Toishi (Last/Fine Grit Step)
Many people prefer to use synthetics for the Aratoishi and Nakatoishi steps to speed up the process. It is worth exploring at minimum the middle to later grit stones of the Nakatoishi line.
Does Japanese Natural Stones (JNATs) Slurry Break Down?
You initially generate the slurry on the surface of Japanese natural stones by using a form of nagura which you then sharpen the blade with. It is common to hear people refer to the slurry as something which can “break down” or “become finer” the more you work it, but many people often interpret that to be something it is not. The initial slurry generated from the stone is comprised of water and the clay-like binder particles knocked free from the stone. Embedded on the surface of the stone and within these clay-like binders are the abrasive substance which cuts the metal. In the case of JNATs, this abrasive substance is usually quartz/silica and is suspended within the clay-like binder which takes the microscopic visual form of a compressed flake of platelet. Under magnification, a JNAT looks like a pile of compressed flakes.
As you work the initial slurry into a finer paste through sharpening/honing/polishing, you are churning these platelets around and altering their shape within the water. This clay-like binder plays a role in how the abrasive silica moves against the blade or metal, altering how the silica cuts and the feel of the blade for the user. This does not mean that the silica abrasive is breaking down though, it is only the clay-like binder which breaks down. When you worked the slurry enough or if you generated it with a fine enough grit diamond plate, your slurry would “finish” breaking down and the platelets would be fully dissolved or worked/broken apart. The clay-like binder material and abrasive are still there, but none of the binder’s original form remains and has been fully changed into clay paste with the abrasive silica particles being fully released into the paste.
It is possible that the sharp edges of the silica are being dulled a little as you continue to work the slurry, but little evidence has been presented to reach that conclusion thus far within the community. Even if it were to be happening, the impact on how it sharpened the blade would be so infinitesimal as to be unnoticeable. When you hear the term “the slurry breaks down” or “as you work the slurry, it becomes finer” this is purely in relation to how the clay-like binder is being worked and what that does to the combined slurry paste.
Japanese Natural Stones (JNATs) Grit Rating
In the below sections I will discuss stones and how coarse or fine they are. Please note that JNATS should not be graded by grit, and one should never seriously consider trying to evaluate JNATS in a grit system like synthetic stones. However, when learning about different types of stone and stone progression, it can help to draw correlations. Comparing the natural stone to the synthetic number will give a general idea which is valuable. The first thing you should endeavor to do though is break the mindset that JNATS be assigned definitive numbers. There are different ways of measuring grit. The grit ratings on this page are relative to the JIS (Japanese Industrial Standard) grit measurements, you can find comparisons to other measurement methods here.
The analogous grit range you see listed for different stones is both due to variance of stones from the same mine, as well as stones which use the same name but are sourced from different mine veins or regional mines all together. Stones like Aoto, Numata, Natsuya, etc. came from either one large region or multiple regions and not one specific mine, as such, these can vary greatly in qualities from one to the next.
Aratoishi – Coarse Stones
The first stone in the progression is named Aratoishi or Arato-ishi. They are typically made of sedimentary sandstone from top strata layers. These stones are the coarsest in the progression, often analogous to x150-x800 synthetic grit. This should give you the idea that it is a very coarse stone. Using them will give very audible and physically rough feedback, and the surface itself will not feel smooth to the hand. These stones are used when sharpening to reform the edge of the blade but will leave a very rough surface. When used for polishing, these will leave a heavy brushed effect with deep scratches along the blade face. Omura-do (Oomura-do, Oomura-to, Omura-to) is a common option. Different Omura stones will have unique coarseness levels, but they will all fall within the Aratoishi range. Another popular option are the coarse red Amakusa stones, though these will tend towards the higher range ~x600-800 range in theory. There is no need to consider that the progression must be one Aratoishi than you move up. You could easily move between two or more Aratoishi stones before you venture onto Nakatoishi. For instance, if the blade was heavily damaged you could progress:
Sasaguchi -> Omura
I prefer using this method over using a single stone as I believe it refines the edge more. It has the obvious downside of needing more stones though.
Out of all of the steps of natural stones, these are the ones I am the most likely to advise people to skip for synthetic stones specifically when talking about Hirashima/Sasaguchi/Chameto Omura (so stones under ~x500 grit). The particles within these stones can be very difficult to control and dislodge from the stone rapidly as you use it. This generates a great amount of slurry/mud quickly and can easily leave rogue scratches above your blade’s edge on the secondary bevel when sharpening. This quality can make the natural Aratoshi desirable though for initial polishing work – so long as you keep the stone surface flat.
I still prefer natural stones for the Aratoishi step above ~x600+ grit range as well as for the next two steps compared to any synthetics. Try out some options and choose for yourself!
Known Aratoishi JNATs List
- Mesuki (~x80-x100)
- Hirashima (~x100-200)
- Sasaguchi (~x150-300)
- Matsuura (~x150-300)
- Chameto Omura (~x150-300)
- Akamatsu (~x300-x800
- Suisa Omura (~x400-x800)*
- Amakusa Akai [Red] (~x400-x800)*
- Unzen (~x400-x800)*
* These stones can be either Aratoishi and Nakatoishi depending on specimen.

Nakatoishi / Chu-Shiage Toishi – Medium Stones
The second stone type in the progression is referred to as Nakatoishi or Nakato-ishi. May also be called Chu-Shiage Toishi, but rarely is. These will be mid-range stones which further define the blade edge left from Aratoishi. Often analogous to x800-x5000 synthetic grit. By the end of the Nakatoishi the blade will feel much more usable but not refined or polished. When used for polishing, these will remove the scratches from Aratoishi and leave a much cleaner brushed effect verging into an actual reflective polish. It will be rare to get a satisfactory polish from Nakatoishi due to the abrasive particles tending towards being fairly coarse, and almost all of them will leave visible scratch patterns on both the cladding and core steel. Binsui-do (Binsui-to) is a common stone used for this range. Binsui stones, like other JNATS, will have unique coarseness or fineness levels per stone so you cannot take generalizations as fact. White Amakusa is another option popular option for this range though it is of extremely variable quality and grit, with the stone being less consistent then Binsui throughout its composition. Aoto is also commonly considered within this progression step. Aoto is a step above Binsui and Amakusa and often better to be thought of as an additional progression step. Good Nakatoishi can be wonderful to work on, but ones that are out of specification or have inclusions will make polishing/sharpening more difficult. I find Binsui, Kaisei, Aizu, and Tajimado to be the least likely to have inclusions or issues. As before, you can move from stone to stone based progressive fineness within the options such as:
Binsui -> Aizu -> Nagura
You must be confident each stone is finer than the last or else you will invalidate previous work.
Known Nakatoishi JNATs List
- Iyoto (~x600-x800)
- Natsuya / Ebisuto [Coarse] (~x600-x800)
- Amakusa Shiro [White] (~x800-x1000)
- Saeki (~x800-x1000)
- Ikarashi / Igarashi / Kasabori [Coarse – White Version] (~x800-x1000)
- Iyoto Shiro [White] (~x800-x1500)
- Kozuke (~x800-x1500)
- Komaki (~x800-x1500)
- Natsuya / Ebisuto [Fine] (~x1000-x2000)
- Oizumi (~x1000-x2000)
- Binsui (~x1000-x2000)
- Numata (~x1000-x2000)
- Ginsei (~x1000-x2000)
- Monzen / Monzento – (~x1000-x2000)
- Oizumi – (~x1000-x2000)
- Aoto [Muddy/Soft] (~x1000-x2000)
- Aoto [Hard/Fine] (~x2000-x3000)
- Ikarashi / Igarashi / Kasabori [Fine – Blue/Green Version] (~x2000-x3000)
- Kaisei (~x3000-x4000)
- Aizu (~x3000-x4000)
- Ueno / Kouzuke (~x3000-x4000)
- Tajima / Tajimado (~x4000-x5000)
- Bushu (~x4000-x5000)
- Bench Nagura (See Below)
Bench Nagura & Why are they called Nagura?
Most bench Nagura fall within the Nakatoishi range of grit of x800 – x6000. They tend to be on the middle or end of the Nakatoishi range, with the finer examples surpassing the x5000 upper range. Nagura means “Correcting Stone” and is most commonly thought of as hand-held pieces we use to rub the top of a stone and “correct” it (recondition) or generate mud before working the blade. However, another way to use the word is in the context of “correcting” the blade. This stems from its use in sword polishing where the Chu Nagura and Koma Nagura got their names from “correcting” the scratch pattern during the polishing process of the sword. This has left a dual use for the term Nagura, which can be quite confusing when entering into the hobby. For instance, a Tsushima Nagura, probably the most accessible of the list in so far as availability and price goes, can be bought in a handheld ~150 gram format or a ~2000 gram bench stone format under the same “nagura” designation. Other whetstones used in this manner will also be called “nagura” instead of toishi, -to, or -do. Stones which share this dual name are often applicable to both cases, they make good hand-held nagura as well as good bench nagura. We will explain a bit more as to why in the next paragraph.
Bench Stones called Nagura in this manner often share a few characteristics. They have a very even and consistent spread of their abrasive material throughout the stone. This leaves a very even scratch pattern on the blade (whether sharpening or polishing). The binder of the stone often does more work than in other Nakatoishi, its composition plays a great role in polishing the blade surface than a “standard” Nakatoishi. This feature is also coupled with abrasive grit which is considered less aggressive than standard Nakatoishi stones, primarily due to the more round formation of it within the stone. This lends to them rounding out more thoroughly and leaving less visible scratches on the metal than standard non-Nagura bench stones. Upper range Nagura stones tend to leave no visible scratches at all and will be purely hazy in appearance (Mejiro/Koma/Gujo) while others get very close to scratch-less (Tenjyo).
Due to this different binder composition, Bench Nagura tend to be much thirstier than “standard” Nakatoishi, which are often already on the thirsty side of things. With a Bench Nagura you may be adding water every 5+ seconds, with it continuously asking for more throughout a significant sharpening/polishing session. In this way they have their trade off, where consistency is traded for upkeep of the stone. These stones (if sealed on sides and back) can be soaked for 5-10 minutes before use which greatly aids in their thirst issue. Lastly, when compared to a similar grit “standard” Nakatoishi they tend to be slower cutting – the cutting speed though is not slow – only slower in comparison. Many of the “standard” Nakatoishi are very fast cutters. This small reduction in cutting speed is often made up for by a vastly superior scratch pattern/kasumi effect.
Bench Nagura tend to come at a higher price, often far higher, than a comparable “standard” Nakatoishi. This is the buyer paying for that consistency, which is more likely with the Bench naguras whereas Nakatoishi can be more variable in performance stone to stone. I’ve never had a “bad” Bench Nagura whereas I have had “bad” Nakatoishi which had variable grits, inclusions, or other issues that did not make them desirable. It is up to the buyer to determine if the greater probability of a quality piece is worth the extra price or to try and source a quality Nakatoishi.
You will notice “Chu Nagura” in the list below. You can read a bit more about this here, but in this case, it is referencing “real” Chu Nagura from Kada mountain rather than “Mikawa Chu Nagura”.
Known Nagura JNATs List
- Mushi Nagura (x3000)
- Ban Nagura (~x3500)
- Atsu Nagura (~x4000)
- Chu Nagura (~x3000-x5000)
- Tsushima Nagura (~x4000-x5000)
- Yae Botan Nagura (~x4500)
- Botan Nagura (~x5000)
- Tenjyo Nagura (~x6000)
- Mejiro Nagura (~x7000-x8000)
- Koma Nagura (~x7000-x8000)
- Gujo Nagura (~-x8000-x10000)
Awasedo / Shiage Toishi – Finishing Stones
The third and last stone type is Awasedo or Awase. You may find this step divided into two categories, Shiage Toishi and Awasedo. When utilized in this manner, Shiage Toishi should refer to a “early finishing” stone, the next step beyond the Nakatoishi class but not where you will likely finish your stone progression. Awasedo is the step beyond Shiage Toishi, and the “late finishing” stone for the progression. When used in this divided manner, Shiage Toishi would be the ~x6000-x8000 analogous range and Awasedo would be ~x8000+ Sometimes based on use case of Japanese terminology, and other times based on ignorance, these terms may not be used in this manner as it is often not a hard rule. Some vendors may use either as interchangeable terms or use Shiage Toishi to refer to all finishing stones. It is the most common in the marketplace though to see Awasedo used to encompass all finishing stones with no mention of Shiage Toishi nomenclature. If you see a vendor only using Shiage or only using Awasedo for all the stones, which is not uncommon, you will have to inquire for them to delineate the differences in their stock.
These are the high range stones which will finish defining and polishing the blade edge left from Nakatoishi. Often analogous to x6000-x12000+ grit range. You can see compared to Aratoishi and Nakatoishi, Awasedo has the largest analogous grit range. What type of stone you want to be your Awasedo will greatly depend on application (knife, sword, razor, etc.) as well as desired blade edge feel. Knive sharpeners may be able to finish a certain blade well on a Shiage Toishi / Awasedo (analogous x6000-x8000) without any issue while a Razor sharpener may not even consider a stone in that range to be an acceptable in any finishing capacity. Similarly, a Razor sharpener may love to finish on a very hard very fine Awasedo (analogous x10000-x12000+) but the knife sharpener may find it rolls their edge too often. This is the most personal area for choosing which stones you like and while you can draw some conclusions from your specific application, testing and experimentation will be necessary. As before, you can transition from Awasedo to Awasedo if you want to move through the steps. This could look like:
Suita [Soft] -> Tomae [Hard]
You will hear some people refer to Suita (a specific type of and strata of stone) as a unique class outside of Awasedo. Suita is a fast cutting stone which is highly sought after. I do not make this specific exception and personally consider Suita within the Awasedo step. I can finish my knives on a soft Suita and my razors on a hard Suita if I am in the mood without issue. This again is where it is a purely personal delineation to make.
Known Awasedo / Shiage Toishi JNATs List
- Uchigumori (~x6000-x8000)
- Honyama Mine Tomae/Suita/Aisa/Namito/etc. [Soft 2-3/5] (~x6000-x8000)
- Honyama Mine Tomae/Suita/Aisa/Namito/etc. [Medium 4/5] (~x8000-x10000)
- Honyama Mine Tomae/Suita/Aisa/Namito/etc. [Hard 5/5] (~x10000-x12000)
- Honyama Mine Tomae/Suita/Aisa/Namito/etc. [Extremely Hard 5+] (~x12000+)
Note: The grit ratings in this area are the most dubious and listing the most likely result. You can find Soft “3/5” stones which are in the 10k range, and you can find Hard “5/5” stones that don’t break 8k. Stones *MUST* be tested to really know, but the guide above allows you to make an edcuated guess about the most probable outcome without testing.
Awasedo Naming / Labeling and Mine Origin
Unlike Aratoishi and Nakatoishi, Awasedo have a more complex naming schema that does not concentrate on the broad region the stones come from. This is due to a few different factors including the many different types/uses/qualities of Awasedo and because most Awasedo come from different mine shafts/veins originating on the exact same mountain range/vein as all the others. If they were named like Aratoishi or Nakatoishi, 90%+ of them would fall under one name (Honyama).
The mine origin name is a major part of the Awasedo labeling. Many people want to know if one mine is better than another – that is an incorrect way to look at the subject. The majority of the mines for Awasedo sit on the same vein (Hon Kuchi Naori) which runs through and north of Kyoto. Any mine on this vein could produce a stone equal to a different mine. Often people will say things like Nakayama stones are superior and the finest stones, or Okudo and Shinden Suita stones are the King and Queen of Suita. These reputations were given to these mines not because the best Nakayama stone was superior to any other stone from any other mine on the Hon Kuchi Naori, but because it produced a larger amount of that type/quality/etc. of stone than other mines on the vein. This is true of Okudo and Shinden Suita as well, all other mines could have produced an equal quality Suita but Okudo and Shinden put out a disproportionately large amount of high quality Suita compared to the other mines. Every stone should be evaluated as an individual, as the name purely correlates to a statistical probability if you grabbed a random stone from a pile and does not designate any quality all Awasedo stones from that mine will intrinsically have.
Often the naming nomenclature of a Awasedo includes the following:
- That the stone is an Awasedo, Shiage Toishi, or Finishing Stone
- The mine origin (Aiiwatani, Nakayama, Ohira, etc.)
- The visual qualities of the stone (Kiita, Goma, Asagi, Karasu, Iromono, etc.)
- The hardness of the stone (x/5 rating, covered further in section below).
- Sometimes this is simplified into what type of application the stone could be good at (razor stone, polishing stone, etc.) or as soft/medium/hard.
- See the section below to understand what that means as x/5 rating.
- The strata they originate from (Suita/Tomae/Aisa/Namito/etc.)
- Out of all of the above, this is the least likely to be included but still often is.
- If the stone does not have a strata listed, it is most probably from the Tomae strata.
- Certain visual qualities (such as Renge, Karasu, etc.) may indicate a specific strata. You can find more on the different visual qualities and what they mean or are related to here.
- Weight of the stone (usually in grams).
It is less important when deciding between these the exact strata they originate from and more their hardness/fineness levels as well as if they have any toxic inclusions (covered below). Certain mines can have reputations for what their stones are like, but all stones must be tested to truly know. Out of all the strata, Suita is most likely to be named due to some of it’s more unique properties.
Stone Name Example: Aiiwatani Kiita Nashiji Masame Tomae Awasedo 4.5/5 1910g
- Mine: Aiiwatani
- Visual Qualities: Kiita, Nashiji, Masame
- Strata: Tomae
- Type of Stone: Awasedo
- Hardness: 4.5/5
- Weight: 1910 grams


Awasedo Polishing – Setting Appropriate Expectations
Many people start looking at Japanese Natural Whetstones for the unique polishing capabilities they impart upon blades of various type. Often, people want what is called a “Kasumi” or misty finish on their blades – where there is a defined contrast between the cladding (for Sen Mai knives) or softer steel area (for Honyaki knives) and the harder core steel. This can be achieved by working through a stone progression to the Awasedo stage, allowing for a nice scratch pattern and polished contrast between the different parts of the blade.
People are usually introduced to achieving this type of polishing through various videos which are at the very end of this process. What is missing from those videos are the hours it takes on low grit stones to prepare the knife for the entire progression as well as the skill it takes to proper polish the knife evenly. If the knife is partially hollow ground or flat ground, the blade will need to be worked on a very low grit (80-140) stone to even out the high and low spots and form a properly flat (for flat ground) or round (for convex ground) surface for progresive stone steps. This is often done on a Atoma/DMT/etc. diamond plate rather than a stone as the diamond plates will keep themselves flat. If the blade is a Convex blade (sometimes called clamshell or Hamaguri-ba) you will not flatten it out, but rather even out the rounded surface and polishing it with a rocking motion that follows the contour of grind. This is a significantly more advanced method and should not be attempted until someone has mastered a flat grind knife polish first.
Either way, it often takes multiple hours on the 80-140 grit stone to prepare the blade, so the polishing area is full of evenly spaced scratches across the entire area you want to polish. If the polish is not even and covering the area fully, you cannot make up for it at the next steps of the process. Even an 80-140 grit diamond plate is very slow at removing steel. If the first step is not done properly your polish will have deep scratches within it and not be even across the area by the end of the stone progression.
As you work the blade on the stone, you want two fingers on or around the shinogi line pressing with moderate pressure (a bit more than taking a pulse) and the other on the handle or tang of the knife. The two hands move together ensuring the blade is not caught on the stone and keeps a nice sweeping motion. The hand on the handle/tang often benefits from a bit of a constant pressure “twist” towards the blade edge, like a very light “revving a motorcycle” pressure to ensure that the blade is kept flat and worked to the edge properly. When you are working on a flat grind knife, it is important to flatten the surface of the stone as you use it. This is especially important for the softer stones commonly used in polishing as they become uneven quickly.
Once you are confident you have evenly worked the area to be polished on the low grit stone/plate, you then progress through the stone progression utilizing the same technique. All scratches from the previous step must be fully removed with each new stone before you move onwards. If you do not fully work a step and move past a stone too quickly, you cannot make up for it at further steps. It can be very frustrating to have to go back because you ignored a scratch, and it will not go away on your current stone. You must carefully inspect your work before you move onto the next stone at each progression step.
When you have moved through your Initial -> Aratoishi -> Nakatoishi -> Awasedo steps, you will be left with a Kasumi finish on your knife. Often people imagine the best possible polish on their knives and can be disappointed when their very expensive Awasedo doesn’t leave a perfectly scratch-less shine on their Kasumi polish. The important truth is that out of maybe 20 Awasedo stones someone tests that have good polishing properties (soft and fine enough), it is likely that 1 of those may be scratch-less with a particular blade. Professional Togishi (traditional Japanese polishers) will have potentially hundreds of stones so that they can test many of them and find the ones “the blade agrees with”. Not all stones will agree with all blades, and what may be scratch less on one blade may not be on another.
People new to the polishing process may become dismayed by this, thinking their expensive Japanese Natural Whetstone will leave the perfect polish and be as fast to complete the process as in the videos they see. It is important to note that even professional Togishi are not relying upon just any bench stone to make a perfect scratch-less polish but often use a special type of stone called Uchigumori, which is especially suited for polishing swords rather than sharpening. In addition, it is still unlikely the Uchigumori will result in a scratch-less finish so the Togishi will then use two different types of Finger Stones to further remove the deeper scratches in specific areas of the blade. This will still not create the desired effect fully, and the Togishi will then move onto using a powder mixed with water (called Nugui) to complete the process and have a fully scratch-less polish.
A very good Kasumi finish with natural stones – for the vast majority of stones, even exceptional ones – will still have tiny scratches left over you can see when the light is reflecting off the blade at certain angles. For good quality stones, these will be micro scratches you can probably only see with the light reflecting off at a steep angle. As discussed above these can be reduced further through the use of finger stones, and then either Nugui or for kitchen knives you can use polishing cloth or powder if you still dislike the micro scratch pattern. Setting these expectations are very important so that you do not set yourself up for disappointment.
Awasedo Hardness / Fineness Scale – Knife Sharpening / Razor Honing / Polishing
For Awasedo/Shiage Toishi/Finishing Stones you will see a stone rated as X out of 5. This rating is usually a dual rating, indicating both hardness and fineness. On the vast majority of stones, hardness and fineness scale together and as such are rated together. There are stones out there which may be finer than their softness suggests, or coarser than their hardness suggests. Always get a reputable vendor to provide feedback on the stone first if they have not already.
Note: As already mentioned above, this is going off the most probable outcome of a stone without being tested. A “typical” 3/5 stone will be able to do this well with knives, honing, and polishing is what the chart below is telling you. There are outliers at all levels of Awasedo and the stone really should be tested before assuming it will perform this way! For example though, if you were to test 10 3/5 stones, we could reasonable expect something like 8+ of them perform as the guidelines details.
The scale of hardness/fineness of Awasedo stones are roughly as follows:
- 1/5 – Unusably Soft
- Knife Sharpening – Unusable.
- Razor Honing – Unsuable.
- Polishing – Unusable.
- 2/5 – Extremely Soft
- Knife Sharpening – Unusable.
- Razor Honing – Unsuable.
- Polishing – Extreme contrast non-mirror kasumi finish on both iron cladding and core steel. Visible scratch pattern will be noticeable on both the cladding and core steel. Functionally performing like a late-stage Nakatoishi but dishing quickly.
- 3/5 – Soft
- Knife Sharpening – Leaves a toothy cutting edge. Good for workhorse tools and knives. Can be used as a pre-finisher for knives which will do raw-protein work. This edge often performs similar to a late-stage Nakatoishi stone.
- Razor Honing – These stones are often thought of as good “pre-finishers”. In practice, 3/5 stones can finish razors to a shave-ready edge but with difficulty. This difficulty lies in the friability of the stone and that when the stone is “refreshed” with a nagura it is very aggressive and thus leaves a toothier razor edge. It will take a long time on the stone to calm it down and smooth it out with the razor, maybe double or triple the time you would spend on a harder stone. As such, it is often easier to have these do fast earlier razor work for you and then move onto a harder stone which doesn’t consume as much labor to get nice and smooth (at the microscopic level) for final steps. With enough time though, any stone which doesn’t scratch the core cladding of a knife visible will likely be able to finish your razor.
- Polishing – Typically a non-mirror brushed looking kasumi finish on both iron cladding and core steel. Stones in the 3/5 range are typically going to be pretty muddy and dish faster. Often it will generate mud at a faster rate than it cuts.
- 4/5 – Medium
- Knife Sharpening – Leaves a refined cutting edge with a little toothiness remaining. Ideal for most knives and some chisels. With pressure and slurry control can finish knives meant for raw protein. This is where the average person prefers their knife finished.
- Razor Honing – Most stones in this range will be able to produce a nice edge on razors which is perfectly workable. Many traditional vintage JNAT barber hones fell within this range. Individuals who like more “comfortable” edges (such as Coticule edges) would prefer this range of razor stone.
- Polishing – Typically a non-mirror kasumi finish on iron cladding and hazy mirror finish on core steel. Good stones in this range will delete large visible scratch patterns on both iron cladding and core steel though average stones will still likely leave a light brushed scratch pattern on most soft cladding. This hardness still allows the stone to be very easy to polish with while not being too muddy. It will self-slurry at basically the same rate it cuts, allowing it to continuously refresh its abrasive particles without generating needless mud. May or may not self-slurry still, but if it does it won’t do it much.
- Notes: This is probably the “classic range” for JNAT stones, and consequently the most expensive range for nice stones. Good stones at this hardness level can do everything a JNAT is meant to do well, and the price point often corresponds to this.
- 4.5/5 – Medium/Hard
- Knife Sharpening – Leaves a refined cutting edge with almost no toothiness remaining. May start being a slower cutting experience. Will have to use Nagura or diamond plate to generate slurry and speed things up or condition the surface.
- Razor Honing – A bump up in keenness from the 4/5 stone but will hone and produce a familiar edge to the 4/5 stone.
- Polishing – Typically a near-mirror kasumi finish on the iron cladding and a mirror finish on the core steel while maintaining some level of contrast. We start to see a sharp decrease in how much metal is really being removed. Cladding often takes on a frosted appearance. This level of hardness is also where stones can start to be more difficult to polish on and can produce uneven polish results without perfect technique. This can easily be evened out with finger-stones later. Very unlikely to self-slurry.
- 5/5 – Hard
- Knife Sharpening – Leaves extremely refined cutting edge with no toothiness remaining. Good for knives focused on delicate proteins, razors, and planes. A danger here is blades may start having their edges easily rolled if you do not hold a very consistent angle. Will have to use nagura or diamond plate to generate slurry to generate slurry and speed things up or condition the surface.
- Razor Honing – This is the level most people who prefer extremely keen razor edges prefer their razors honed. Edges produced are still comfortable enough while being extremely keen. Honing on this hardness of stone starts to have a glassy feel with the stone still providing less feedback on its surface.
- Polishing – If the knife agrees with the stone, it should leave a more advanced near-mirror finish on iron cladding and core steel. Many stones at this hardness start to get scratchy (not micro scratches which most stones leave but deep scratches) because the binder is very compact, or the abrasive grit is above the HRC of the knife. This is almost always an issue for the cladding which has a very low HRC. This happens in particular when the binder is worn down, exposing more of the abrasive which is still stuck in place. If a stone does this, it may still be usable for polishing through frequent and aggressive surface refreshing (Atoma 140 or similar) however it will no longer polish like a 5/5 stone at that point. You would have to refresh every few passes of the knife to ensure no abrasive sticks out and scratches. Most 5/5 stones should not be purchased with polishing in mind, or a lot of tests from the vendor that it doesn’t contain scratchy particles and freely refreshes as it is used – which is very rare for such a hard stone.
- 5+ – Extremely Hard
- Knife Sharpening – This level of hardness is very likely to roll knife edge without a perfect technique. Will have to use Nagura or diamond plate to generate slurry to generate slurry and speed things up or condition the surface. These are not usually recommended for knife sharpening.
- Razor Honing – Will produce the keenest possible edges but may lose the “comfort” afforded at early stages. Many users with very dense or thick beards will prefer edges at this level, where the ability for the razor to move through the hair easily is paramount. Some 5+ stones are scratchy because of such high HRC abrasive, and the stone must be checked so as not to scratch the razor’s edge. The honing feedback on these stones will be extremely glasslike with little to no feedback, often the slurry is very silky.
- Polishing – Usually unusable. The particles will either not be freely released or will be released and are still likely to scratch your blade because nothing is breaking them down as the blade moves against the stone. Exceptions may exist, and many of those are just mislabeled (but good quality) 4.5 or 5 stones.
Note that this rating system is only within when comparing Awasedo to other Awasedo. A “coarse” Awasedo of 3/5 will still be far finer than any Aratoishi or Nakatoishi stone.
Japanese Natural Stones (JNATs) & Awasedo Hardness / Density Scale
Unlike fineness, which has to be analyzed off the scratch pattern a stone leaves or estimated by a vendor, we do have better tools to estimate relative hardness so long as we have the following measurements of the stone:
- L x W x H (in mm)
- Weight (in grams)
These are usually going to be provided by the vendor on the listing. With these numbers, we already have the weight of the stone in grams and can easily find the volume in mm3 by multiplying the length by the width by the height. From there, we can divide the mass of the stone by the volume, giving us the relative density of the stone in grams per cubic mm. The higher the g/mm3, the denser the stone.
Personally, I do not find this to be an easy number to conceptualize in my mind. A cubic mm is very small, and I have no rational point for relation to it. Instead, I prefer finding the volume per gram, so how much stone do you need to get 1 gram of weight. This I find to be a much easier to conceptualize as a number. Unlike density, the lower this number is the denser the stone (due to lesser volume of stone being needed to achieve 1 gram in weight).
I will list a general scale below which will help you understand how hard different stones are. This is pulled from my own experience as to what a 5+, 5/5, 4/5, 3/5, etc. stones are, as well as from about 300 other stone ratings from community members or vendors, but at the end of it I am still having to draw the thresholds somewhere and are estimates.
The numbers are my personal opinion on the compiled data, but generally line up when you look at how other are ranking their stone hardness. If an individual’s/vendor’s numbers do not line up perfectly with the guidelines below, it doesn’t necessarily mean they are being dishonest. Their judgement of what a x/5 stone is may simply be different from my own. Wildly divergent numbers should be a topic for investigation though, and my first course of action in such an event would be to get the person to verify the weight and dimensions are actually correct. Make sure weights are not including things like wood bases, or else the accuracy will be heavily skewed.
Stones are complex creations of nature and can vary in grit, performance, and composition. If a stone is drastically out of scope of the estimated ranges below it may mean the seller has a different expectation of the number than you, or the stone has unique properties the average stone does not have which may increase or decrease its density in relation to the average stone of that range. The stone may also change composition later within its structure to a higher or lower density – this is especially true for larger stones. These scales are the most useful when you are in a position to make estimates such as auctions where the seller is uninformed or non-communicative. If you can get further details about the stone, check the results and performance of the stone there rather than getting caught up on the calculation grouping.
Also take note that this is not the same as Specific Gravity. Specific gravity should be measured with a water displacement test (which will also give a more accurate density calculation). This density concept is only quick estimate math when looking at stones you cannot test or measure yourself. Water displacement density measurements will usually be lower than those calculated via this method because JNATs typically absorb water and measurements are often off by a small amount.
I am lumping starting number stones together besides 5+ (e.g. 4.5 and 4 are in the same overall 4 category, you can use the scales to understand what is a 4 versus a 4.5):
- 5+ Stones
- Below 370 mm3/g
- Above .00270 g/mm3
- 5/5 Stones
- Between 370 mm3/g – 390 mm3/g
- Between .00270 g/mm3 – .00260 g/mm3
- 4.5/5 Stones
- Between 390 mm3/g – 405 mm3/g
- Between .00260 g/mm3 – .00250 g/mm3
- 4/5 Stones
- Between 405 mm3/g – 425 mm3/g
- Between .00250 g/mm3 – .00235 g/mm3
- 3.5/5 Stones
- Between 425 mm3/g – 440 mm3/g
- Between .00235 g/mm3 – .00225 g/mm3
- 3/5 Stones
- Above 440 mm3/g
- Below .00225 g/mm3
Because the measurement of your stone is likely imperfect (as most stones are not perfect rectangles) your values are not probably 100% accurate to run around claiming you have calculated a perfect measurement of density. To do this, you would need to do water displacement calculations and such. However, they will be accurate enough to double check hardness of a listing without concern.
Additionally, this measurement can get a little messy with thirsty stones (like Nagura and Suita). This makes sense, as it has holes within its structure, so a larger portion of the volume we are calculating is taken up by air than on other strata stones. With that in mind, skew the numbers a little (for instance, 5+ may be below 385 mm3/g instead of 365mm3/g).
I am not going to calculate 2/5 or 1/5 stones, as sample size is poor, and you can extrapolate from above. These stones are so rare due to their lack of usability anyway.
Calculation Example
- Dimensions: 209x74x29mm
- Weight: 1369grams
First, we multiple Length x Width:
- 209 x 74 = 15466
Next, we take that result, and multiply it by height:
- 15466 x 29 = 448514
Once we have these numbers, we can use our volume of 448514 m3 and mass of 1369 grams to determine two different values we discussed above. To measure the volume per 1 gram of the stone, we divide the volume by the mass of the stone as such:
- 448514 / 1369 = 327.6216216216216 m3/g
We can round that down to 327 m3/g. Looking at our chart, we can see it is a very hard stone! Alternatively, we can measure the amount of weight it would take to fill 1 m3 of space by flipping the equation:
- 1369 / 448514 = 0.003052301600396 g/m3
We can round that to 0.003 g/m3, which fall inline as it should with the same conclusion we reached with the volume per 1 gram conclusion – it is a 5+ stone.
Uchigumori
Uchigumori is worthy of its own section. Uchigumori is a specific type of Suita, all Uchigumori are Suita but not all Suita are Uchigumori. It is a generally softer type of Suita which have unique particle qualities (how the binder and abrasive are formed together) which make the stone particularly suited to polish extremely pure high-carbon steel. This stone is both an essential and historic part of Japanaese sword-making culture as well as somewhat scarce, only coming from the upper layers of the Suita strata called Tenjyou Suita. This cultural alure and relative scarcity compared to more plentiful stones make Uchigumori more expensive. It could be used like a soft Suita for sharpening, but due to the cost it is generally price inefficient to use it just for razor or knife sharpening. Theoretically, it could however fit into an early Awasedo stage, like soft Suita would and could do quite well on cutlery or pre-finish razor work. Due to this cost though, Uchigumori is purchased almost exclusively for sword making/polishing and as such I would generally leave it out of the Aratoishi -> Nakatoishi -> Awasedo progression. As always, there are exceptions to the rule. For knife polishing, it is unlikely the benefits of Uchigumori will be worth the price. A soft Tomae or Suita will likely produce a relatively similar kasumi finish without the extreme price point.
Though this information is more relevant towards sword polishing, I will still put it here for people who are interested. There are two types of Uchigumori, Hato/Habiki/Hazuya and Jito/Jibiki/Jizuya. Hato is the softer and easier to work with of the two options. This is used to bring out the details in the Ha, or the hard core on the blade. Hato is used before Jito, and you progress from one to the next. Jito is harder and more difficult to work with. Jito is used to bring out details in the Ji, or the softer supporting steel of the blade. When referencing “hard core” steel and “softer supporting” steel, this is referring to either a Honyaki style blade or a Honsanmai / Soshu Kitae forged sword. The soft cladding on Japanese kitchen knives does not really function the same, and the same benefit is unlikely to be seen as on these style blades.
Another way to utilize Uchigumori is in the form of finger stones. These are much more applicable to knife polishing. Finger stones are small pieces chiseled off of a larger Uchigumori block which are very thin and small. These may be used as a coin sized piece which is flattened or more traditionally glued to rice paper. Using a finger stone also allows you to rub the stone on the blade rather than the blade on the stone. This is often useful for less experienced polishers or touch up work at the final stages of polishing. Professional sword polishers use finger stones after their last bench stone to even out the polish. Lastly, these finger stones can be great because they are affordable. Finger stones may last a very long time and give you access to Uchigumori without having to purchase a whole bench stone.
A third method of using the stone is as a finely crushed powder, often called Uchiko powder. Similar to finger stones, this is used later in the process for touch up or final work on the sword polish.
While Uchigumori is usually only recommended for sword polishing, it can still work for knife polishing. This is especially true of Hato Uchigumori, as it will easily produce a beautiful kasumi finish similar to a soft Suita and is less likely to be scratchy on the soft cladding. When used for knife polishing, Uchigumori would be far more suitable for a Honyaki style knife or one of the Tamagahane knives – both styles can be quite rare and expensive though. If you have a standard cladded knife and are interested in Uchigumori it can be something to try. It is important though going into it to understand that there is a high likelihood it will not produce a drastically different result than a soft Suita or Tomae stone.
One benefit Uchigumori finger stones or Uchiko powder can bring to knife users is utilization as a rust eraser. Many of the rust erasers easily found for knives will leave small but new scratches on the finish. Soft Hato Uchigumori finger stones or powder can do a good job of removing surface rust without leaving significant visible scratches. Should it change the kasumi finish in that area of the knife drastically, it is easy enough to do it along the whole blade to even it out.
Known Uchigumori JNATs List
- Ohira
- Mizukihara
- Namikawa
- Namikawa Uchigumori is actually Mizukihara Uchigumori. Namikawa is a supplier for it, and often will not label it as Mizukihara clearly.
- Shohonyama
- Shohonyama is a designation for the stone rather than a different Mine. You may see Uchigumori listed as Shohonyama without including the Mine, but it still must be from either Ohira or Mizukihara.
- Maruoyama
- Sometimes you will hear reference to Maruoyama Uchigumori. This is a misnomer, as Uchigumori must come from a specific mountain, which Maruoyama mine is not on. There is no way for anything from Maruoyama to be real Uchigumori. Many will claim Maruoyama can replace Hato Uchigumori. You will have to test for yourself. I have Maruoyama in this section due to the frequency of it being referred to as Uchigumori. The mine owners will often label a stone as Shiki Uchigumori, but they mean in the context of “acting like” Uchigumori not that it “is” Uchigumori.
Inclusions and Toxic Inclusions in Japanese Natural Stones (JNATs)
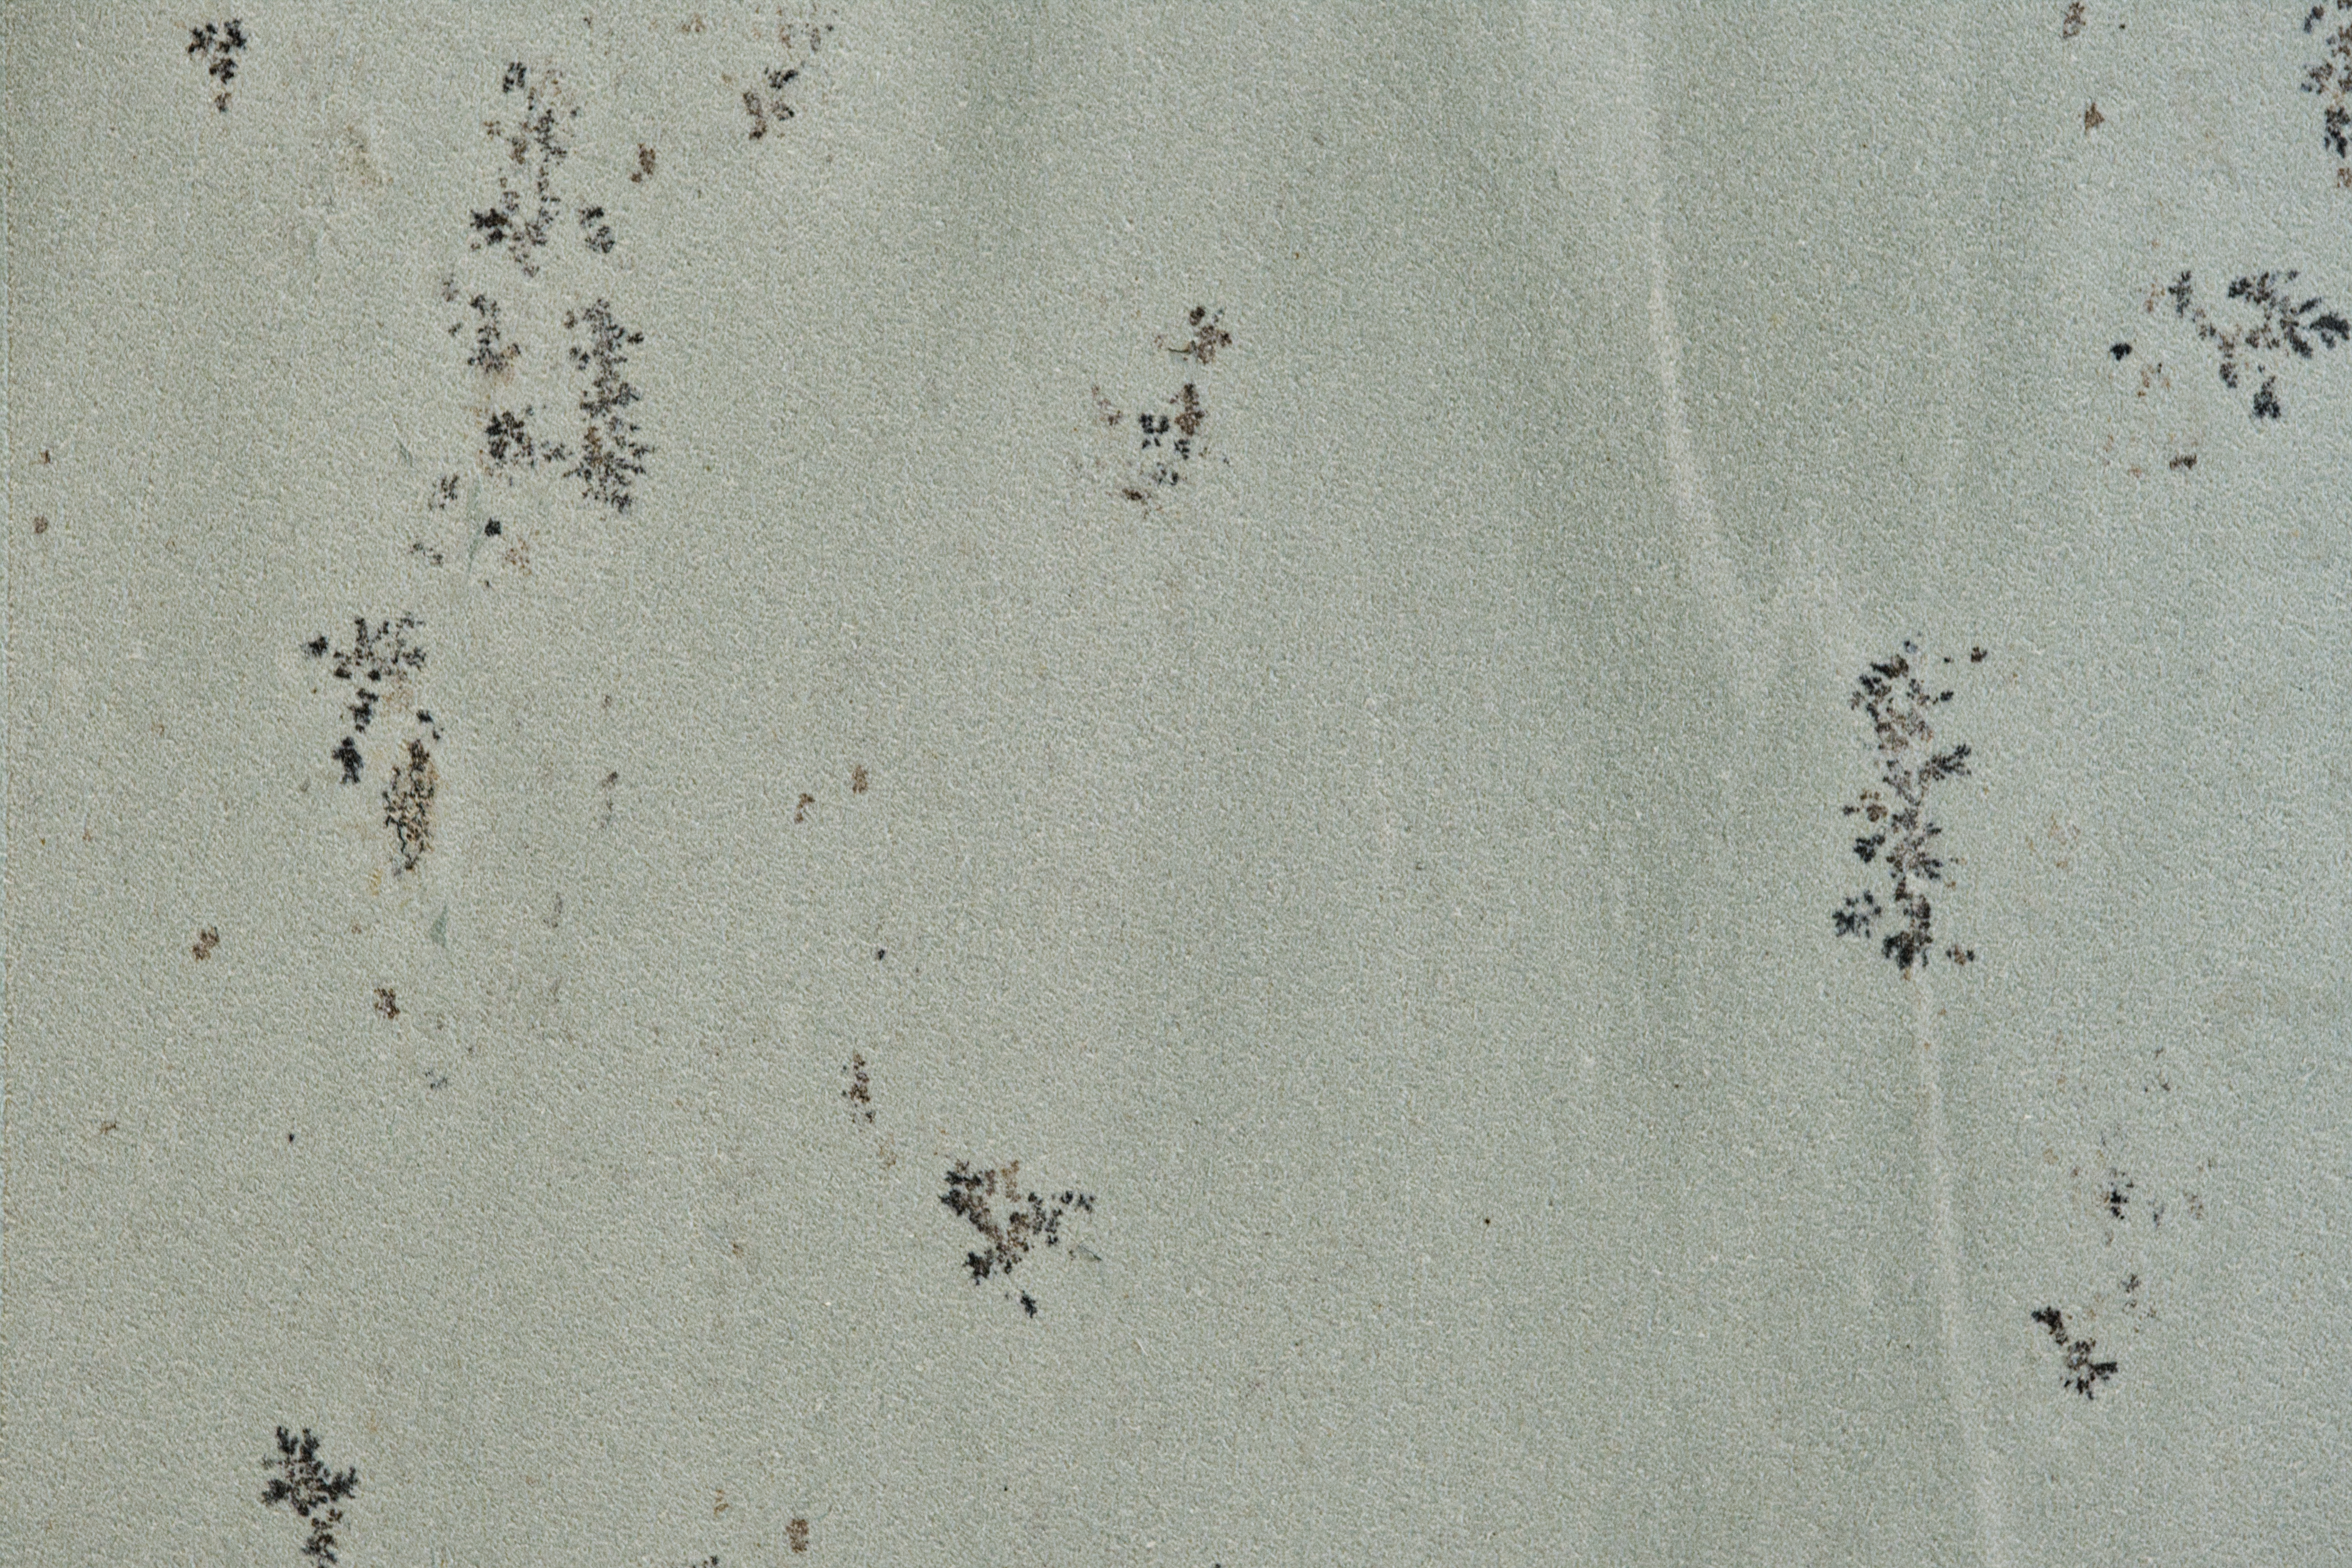
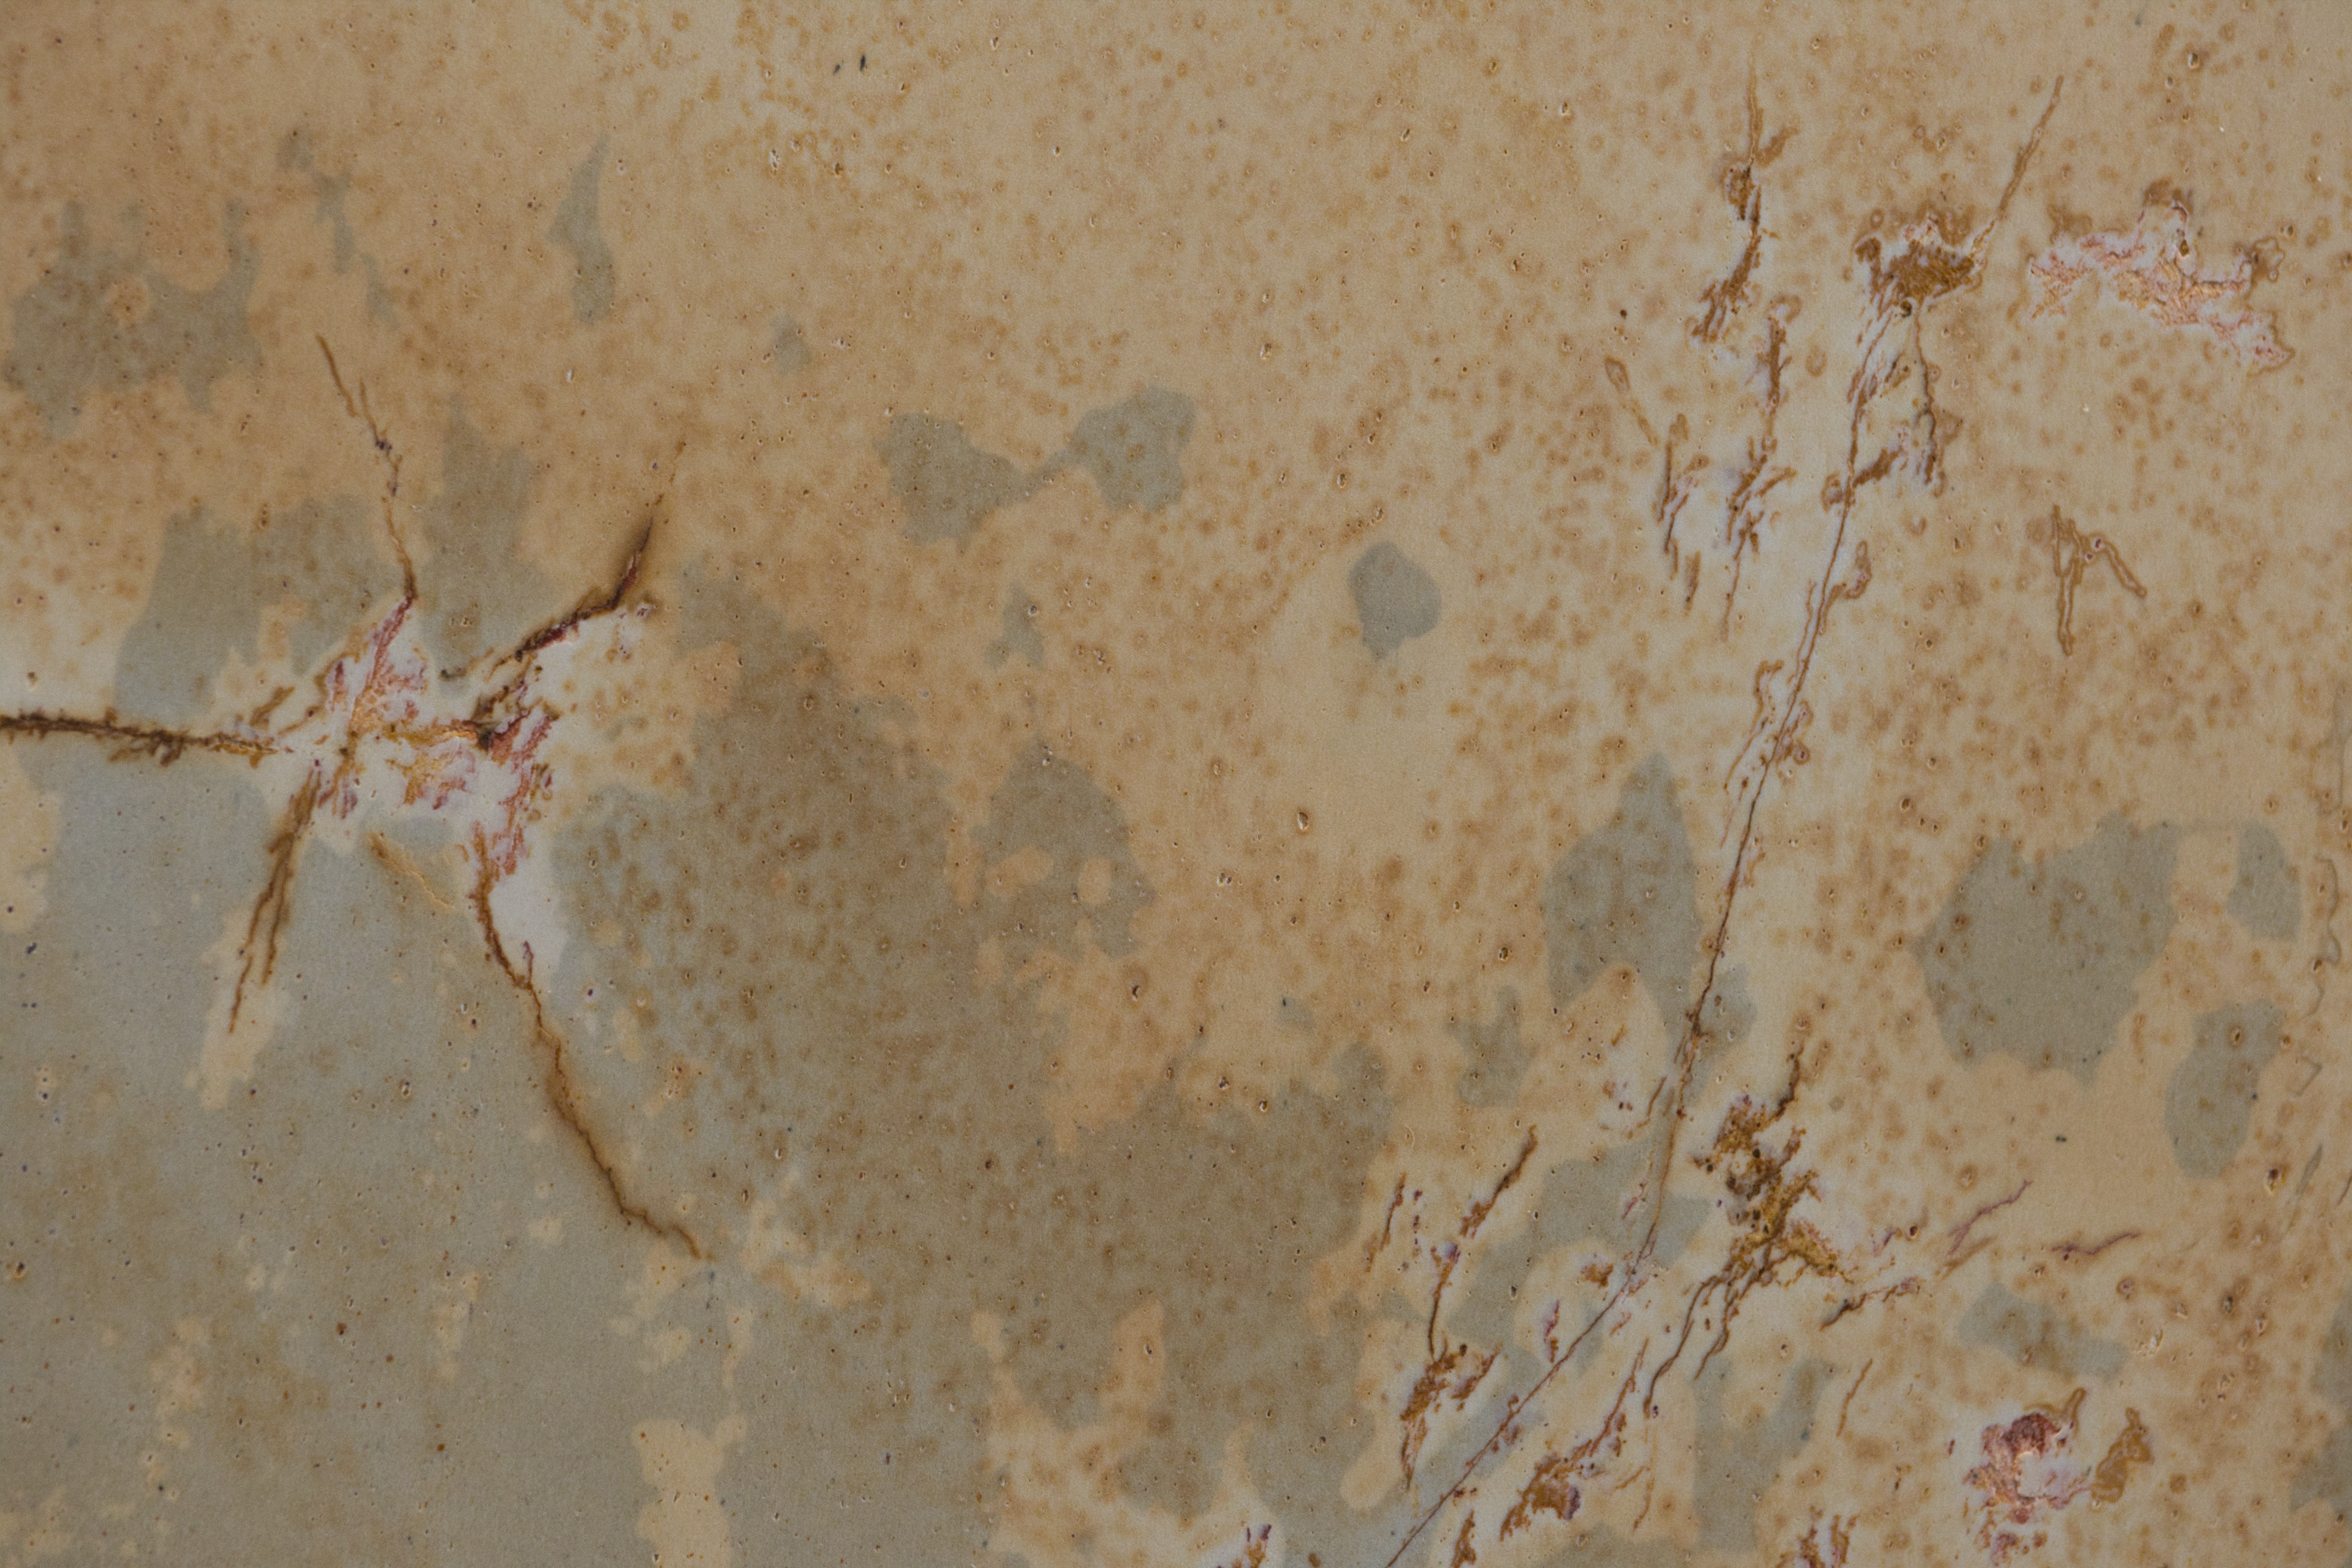
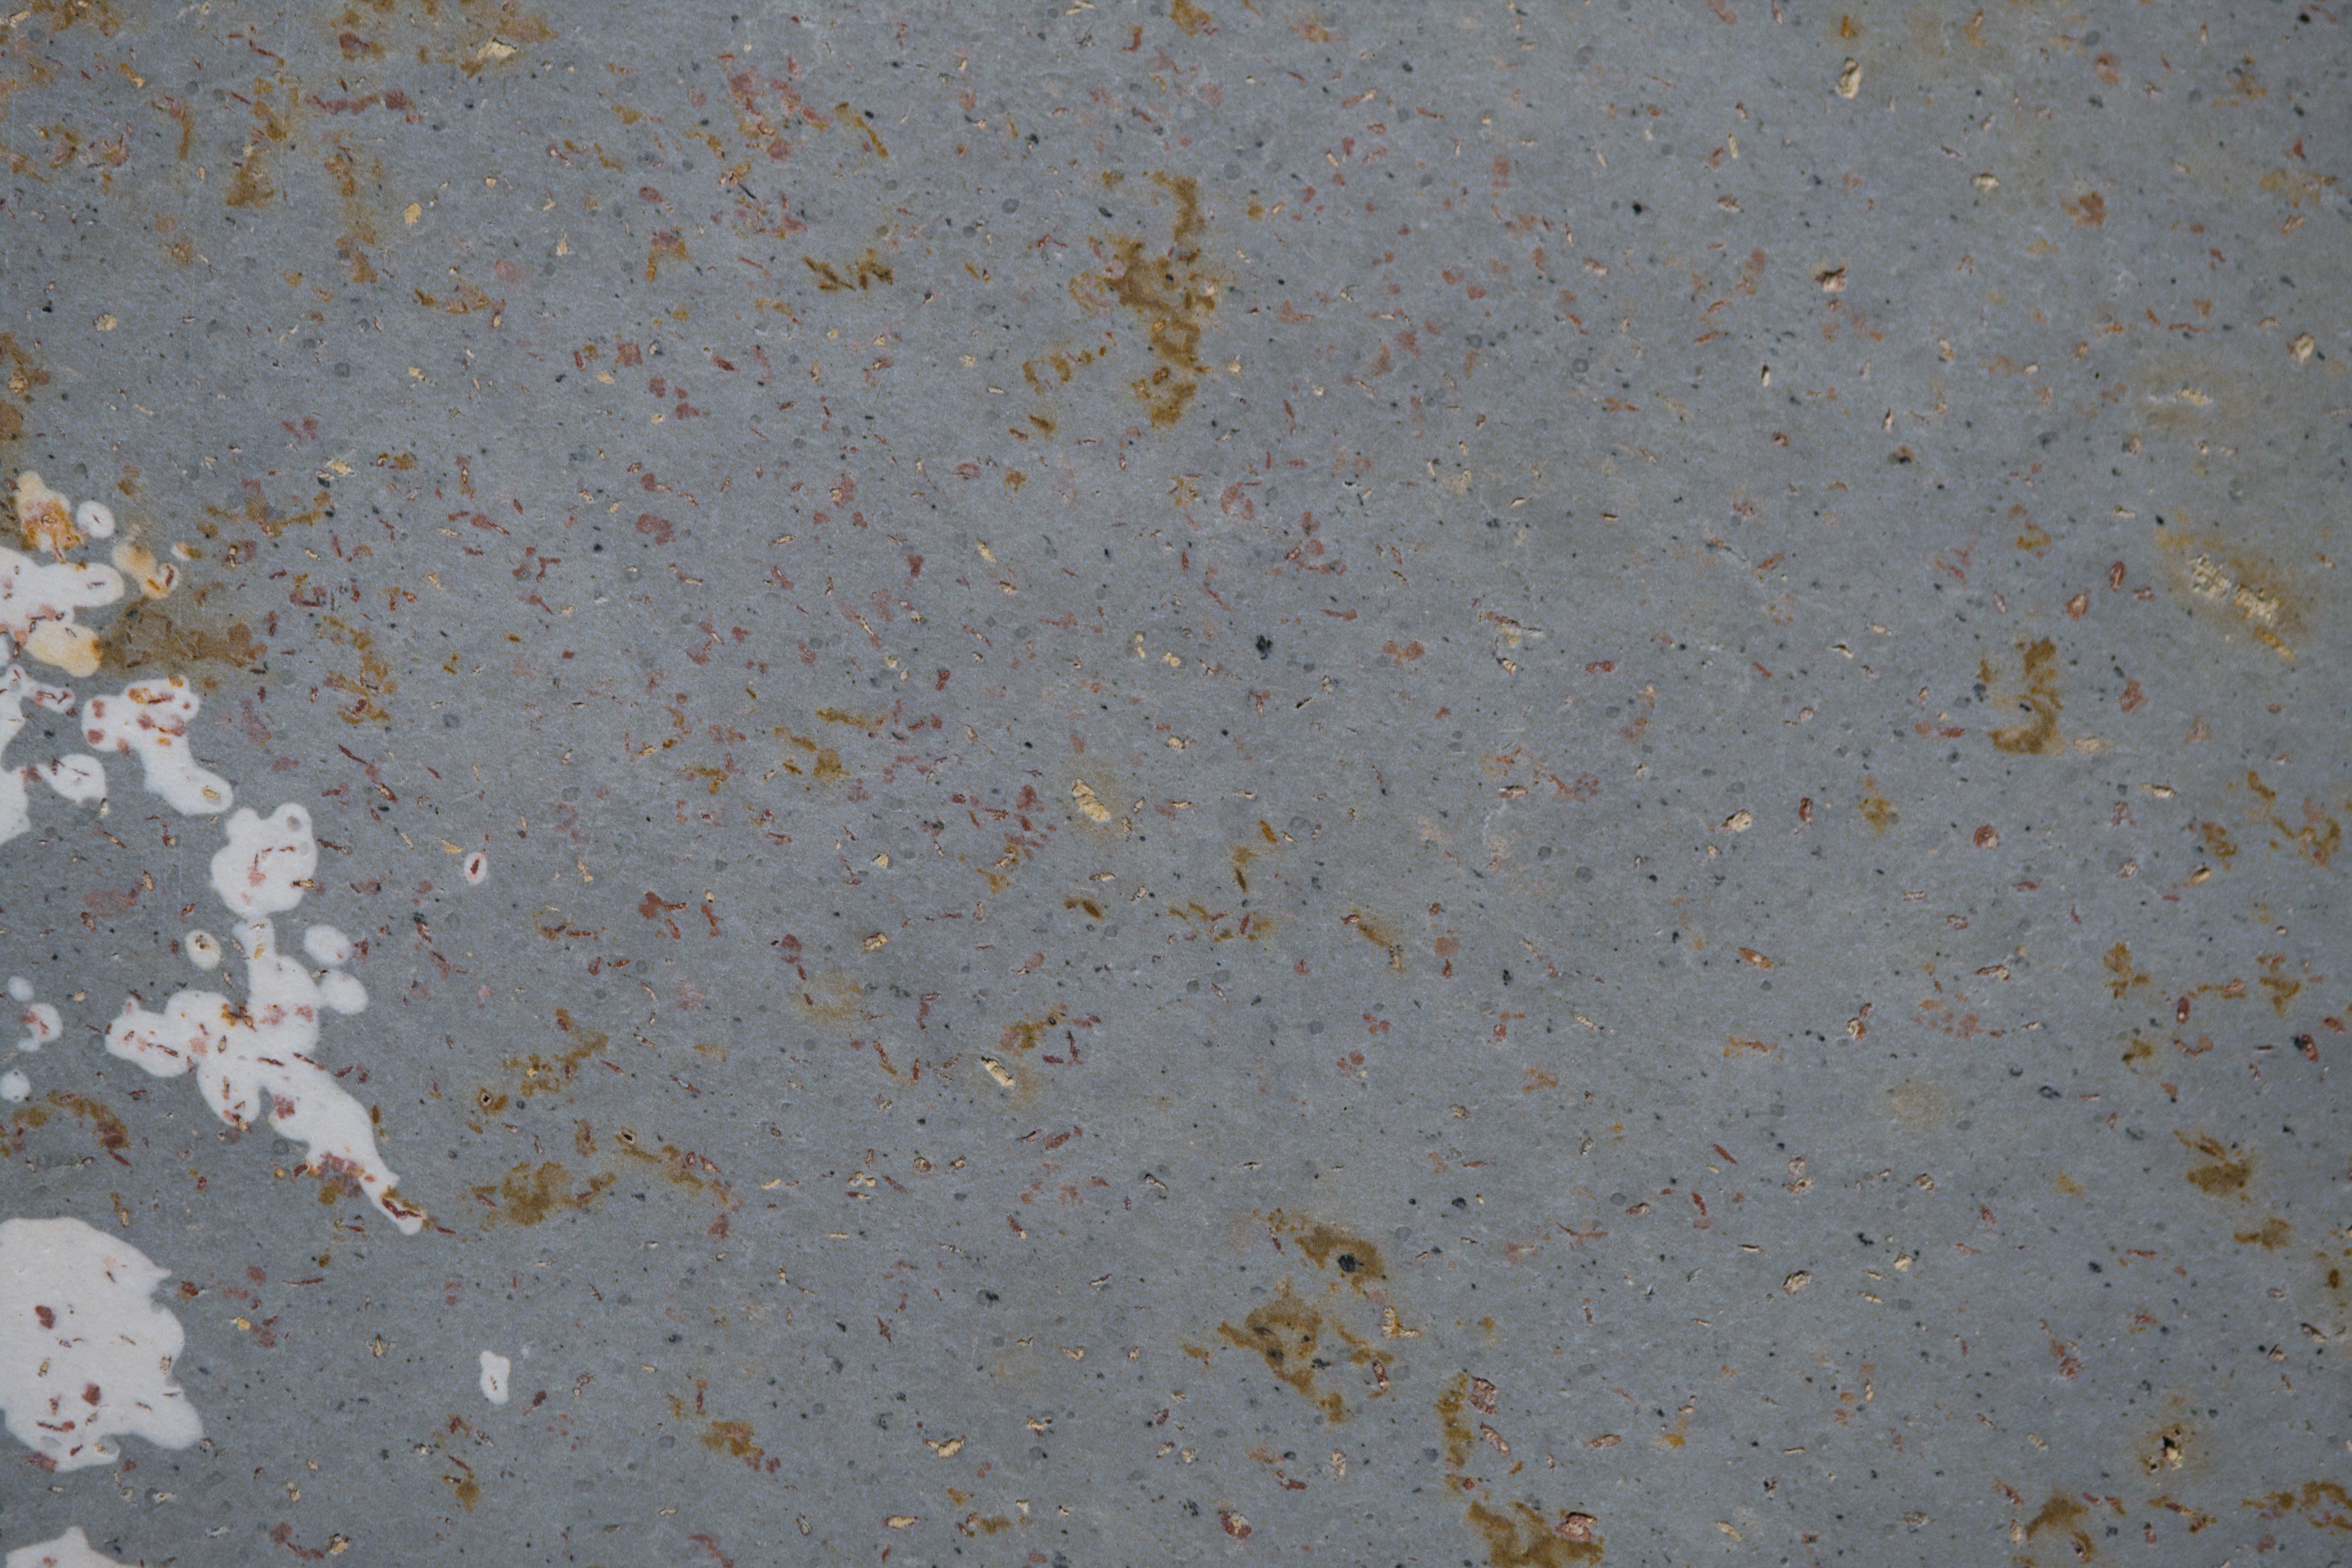
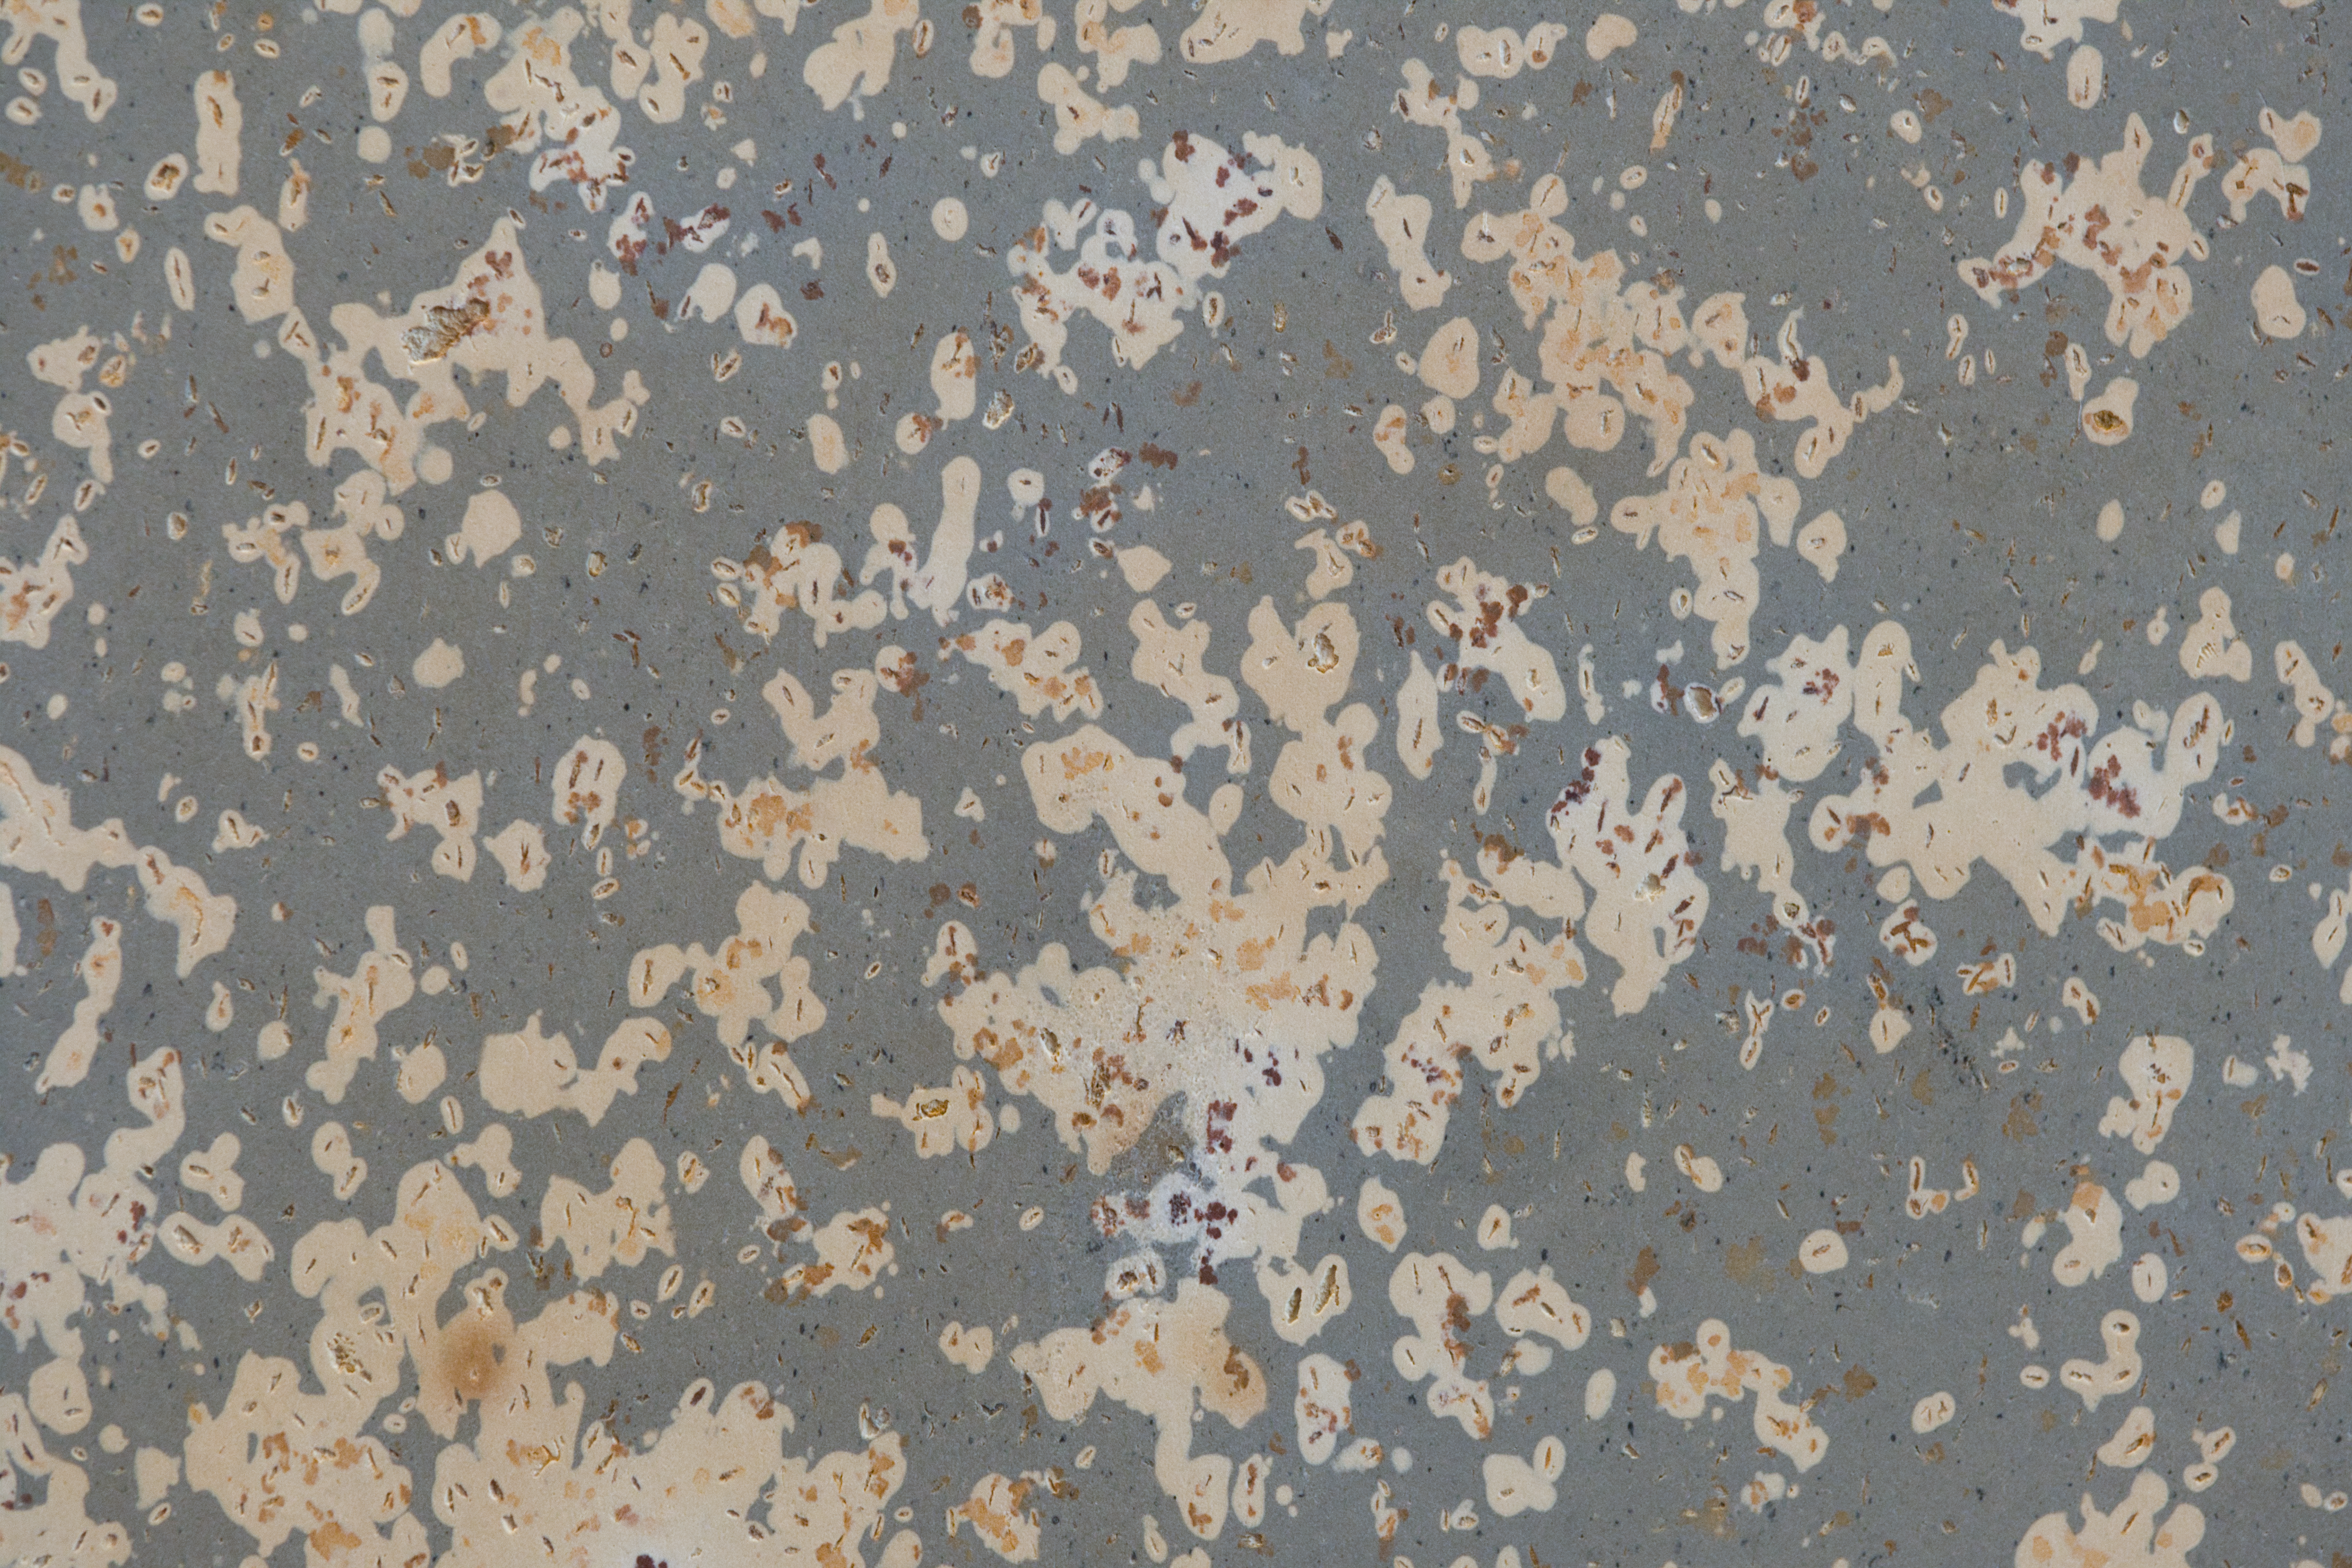
It is important to identify from the start that the concept of toxic inclusions are not toxic towards the human, but towards the blade’s edge or polish. There are multiple types of inclusions both toxic and benign which you can find on the glossary page. Many stones out there have some form of inclusion. They often show up as lines, renge, spots, etc. on the stone itself. The majority of these inclusions are not a problem, either the same hardness as the compressed material it is imbedded within or softer. In either of these cases, it does not disturb the blade running across the surface of the stone nor introduce scratchy/harder grit into the sharpening slurry.
Toxic inclusions are a mineral line in the stone that are harder than the stone it is imbedded within. Commonly, this is some type of mineral deposit running through the stone. Once the stone is lapped flat, you will usually “feel” these lines on your finger or the blade as you run across them. In the event you get a stone with a toxic inclusion, it does not make the stone unusable, but the issue must be treated. At minimum, the line must be dug out with a nail or other hard instrument so that it is below the sharpening surface and as such not felt on the blade’s edge. This is usually a fast and straight forward process. In the past when I had any stone with a toxic inclusion, I would dig out the whole line until I got rid of all the foreign material. This was for two reasons. Primarily because I didn’t want any of those particles dislodging into my slurry at any point ruining the work I had done. Secondarily, toxic inclusions can have a tendency to “swell” with the addition of water and crack the stone. It is best to get rid of them at once and put your mind at ease in my opinion.
Japanese Natural Stones (JNATs) Naguras
Naguras are a topic in and of themselves. You can find more information on them here both about types of naguras and specifically the famous Asano Mikawa Naguras. I will do a very brief overview here though. A nagura is a natural or synthic stone piece you rub on the surface of the whetstone to generate slurry. For natural whetstones, you want to use natural nagura or else you pollute the slurry with synthetic grit. Naguras can be used to raise slurry from the primary whetstone (harder nagura than stone), or raise slurry from the nagura (softer nagura than stone). Naguras are the key to using a single Awasedo stone instead of progressing through Aratoishi – > Nakatoishi -> Awasedo. The nagura allows you to add coarse, medium, or fine grit slurry to the Awasedo and progress in that manner. This is very popular in the razor sharpening community. It is an intricate task but the primary benefit of doing the progerssion on a single Awasedo with nagura is cost. I highly suggest you read the specific nagura section to get the full depth of this topic.
Different Japanese Natural Stones (JNATs) Mines
The most common name you will hear associated with a JNATS is the mine it originates from. Some of these names within the community have taken on a near legendary status such as Nakayama, Okudo, and Ohira. Why stones originating from these mines are so sought after can be due to many factors. Some of it is due to the mines’ legacy and history such as Nakayama. Others because of a specific stone type pulled from that area which was exceptional in its qualities such as Okudo Suita or Ohira Uchiguimori. Are these stones actually better than stones from other mines? In certain circumstances yes. Often though, not for the monetary difference being asked for.
Many of the prominent Japanese mines have been closed for years now. Most stopped operating in the mid to late 1980s. There are still some well-known mines that are active or semi-active. This doesn’t necessarily lead to the stones being cheaper, but it does make certain origin stones easier to find. Due to these mine closures, the vast majority of stones today are pulled from large storage piles of old mined stones. Compared to the 1980s stones are becoming more scarce, though it is still easy to find many different types and mine origins on the international market for the right price.
It is also important to understand that the majority of JNAT material is not being sold to the average consumer. Instead, the majority of Japanese natural stones are bought by the traditional craftsman and sword makers of Japan. Often the qualities of these highly priced stones are only truly appreciable to the masters in those industries. It is unlikely to make a difference in your personal kitchen or garage. Of course, the value is in the eye of the beholder and you must decide for yourself the worth a specific stone’s qualities has. I have put together a referable list of Japanese mines here. In the majority of circumstances, just because a stone came from a certain mine does not make it unique or of any guaranteed quality.